1. 简介

Redis是一个开源的,基于键值对的存储系统。它所有的数据都存储在内存中,读写速度远超于硬盘,同时将内存中的数据异步写入硬盘进行持久化。
Redis是一个单线程模型,所有的命令是串行执行,在并发的场景下不需要考虑数据的一致性问题。
Redis支持的多种不同的数据类型,常用的有:String(字符串) 、Hash(哈希表)、List(列表)、Set(集合)、Zset(有序集合)。可用作NoSQL数据库、高速缓存、消息队列等方面的应用。

2. 安装

安装包版本「redis-3.0.6.tar.gz

操 作 系 统「CentOS 7」

解压缩并进入解压缩后的目录:

1
$ tar zxvf redis-3.0.6.tar.gz && cd redis-3.0.6

编译安装:

1
# make && make install

如果报“/bin/sh: cc: command not found”说明缺少gcc编译环境。安装gcc编译环境:

1
# yum install gcc


重新编译安装:


1
# make clean && make && make install


如果报“zmalloc.h:50:31: fatal error: jemalloc/jemalloc.h: No such file or directory”

编译时需指定MALLOC=libc。重新编译安装:


1
# make clean && make MALLOC=libc && make install


为了方便管理,我们将redis的配置文件移动到一个统一的目录里面。首先创建这个目录:

1
# mkdir /usr/local/redis

然后将安装目录下的redis.confsentinel.conf文件拷贝到该目录:

1
# cp redis.conf sentinel.conf /usr/local/redis/

3. 配置

编辑redis配置文件“redis.conf”:

1
# vi /usr/local/redis/redis.conf

修改内容如下:

1
2
3
4
5
6
7
8
9
10
11
# 是否以守护进程的方式运行
daemonize yes
#
# 当redis作为守护进程运行时,它会将pid写入到该参数指定的文件里面
pidfile /usr/local/redis/run/redis.pid
#
# 文件保存到磁盘的快照文件的目录路径
dir /usr/local/redis/data
#
# 日志文件
logfile /usr/local/redis/logs/redis.log

创建上面配置的对应的目录rundatalogs文件夹:

1
# mkdir /usr/local/redis/{run,data,logs}
常用的配置项含义如下:
1
2
3
4
5
6
7
8
9
10
11
12
13
14
15
16
17
18
19
20
21
22
23
24
25
26
27
28
29
30
31
32
33
34
35
36
37
38
39
40
41
42
43
44
45
46
47
48
49
50
51
52
53
54
55
56
57
58
59
60
61
62
63
64
65
66
67
68
69
70
71
72
73
74
75
76
77
78
79
80
81
82
83
84
85
86
87
# # # # # # # # # # # # # # # # # # 通用配置 # # # # # # # # # # # # # # # # # #
# 是否以守护进程的方式运行(守护进程就是在后台一直运行的进程)
daemonize yes
#
# 当redis作为守护进程运行时,它会将pid写入到该参数指定的文件里面
pidfile /usr/local/redis/run/redis.pid
#
# 端口
port 6379
#
# 当客户端闲置多长时间后断开客户端与服务器之间的链接。0表示禁用此功能
timeout 0
#
# 日志级别。
# redis提供4种日志级别,它们按从低到高分别是:debug < verbose < notice < warning
loglevel notice
#
# 日志文件。默认是标准输出(输出到终端窗口)
logfile /usr/local/redis/logs/redis.log
#
# 数据库的数量。默认是使用0号数据库。可以使用select <dbid>命令来使用指定的数据库
databases 16
#
# # # # # # # # # # # # # # # # # RDB 快照配置 # # # # # # # # # # # # # # # # #
# 内存中缓存的数据保存到磁盘快照文件的规则(可以配置多个,只要条件满足其中的任意一个)
# 配置规则:save <seconds> <changes>
# 规则含义:当<seconds>秒内有<changes>个键发生变化时则触发一次持久化
# 当900秒内有1个键发生变化时
# 当300秒内有10个键发生变化时
# 当60秒内有10000个键发生变化时
save 900 1
save 300 10
save 60 10000
#
# 存储到磁盘中的快照文件是否进行压缩
# 压缩可以节省磁盘空间,但压缩数据会消耗CPU资源
# 不压缩不会额外消耗CPU资源,但占用磁盘空间变大
rdbcompression yes
#
# 保存到磁盘的快照文件的文件名
dbfilename dump.rdb
#
# 文件保存到磁盘的快照文件的目录路径
dir /usr/local/redis/data
#
# # # # # # # # # # # # # # # # # # 主从配置 # # # # # # # # # # # # # # # # # #
# 配置语法:slaveof <masterip> <masterport>
# 配置该项说明当前服务是一个slave节点。它会根据配置从master节点进行数据同步
slaveof 10.10.10.127 6379
#
# 当master节点设置了密码时,当前slave服务连接master时使用的密码
masterauth 654321
#
# 配置当前slave节点是否为只读。
# 如果配置为no,即可读可写。需要注意的是,写入slave的数据将会在主从同步发生后被清理掉
slave-read-only yes
#
# salve会按该值(单位:秒)周期性的向master发送PING包
repl-ping-slave-period 10
#
# PING的超时时间(单位:秒)
repl-timeout 60
#
# slave的优先级。数值越小,优先级越高
# 优先级高的salve将会在master故障后被选中升级为master。如果设置为0,则永远不会被选中
slave-priority 100
#
# # # # # # # # # # # # # # # # # # 安全配置 # # # # # # # # # # # # # # # # # #
# 密码。如果设置了密码,客户端链接时需要先进行密码验证。
requirepass 123456
#
# # # # # # # # # # # # # # # # # # 限制配置 # # # # # # # # # # # # # # # # # #
# 同一时间内redis可以接受的客户端连接数的最大值
maxclients 10000
#
# # # # # # # # # # # # # # # # # # AOF 配置 # # # # # # # # # # # # # # # # # #
# 是否开启AOF日志功能
appendonly no
#
# 保存到磁盘的AOF文件的文件名
appendfilename appendonly.aof
#
# 日志文件更新的模式。有三种可选值:
# no: 让操作系统自行决定同步的时间。这种模式下,redis性能最好
# always: 每次写入都同步到日志文件。这种模式下,redis性能慢,但数据最安全
# everysec:每秒同步一次。这是性能和数据安全的一个折中模式
appendfsync everysec

4. 启动和关闭命令

默认的方式启动(按默认的redis.conf配置在前台启动):

1
# redis-server

指定配置文件启动:

1
# redis-server /usr/local/redis/redis.conf

关闭服务(redis-cli -p [port] shutdown):

1
# redis-cli -p 6379 shutdown

强行杀死进程可以使用kill -9 [pid]

5. 开放端口

开放防火墙端口:

1
-A INPUT -p tcp -m state --state NEW -m tcp --dport 6379 -j ACCEPT

6. 简单应用

# pom.xml


1
2
3
4
5
6
7
8
9
10
11
<dependency>
<groupId>redis.clients</groupId>
<artifactId>jedis</artifactId>
<version>2.9.0</version>
</dependency>
<dependency>
<groupId>junit</groupId>
<artifactId>junit</artifactId>
<version>4.12</version>
<scope>test</scope>
</dependency>

单元测试:

1
2
3
4
5
6
7
8
9
10
11
12
13
14
15
16
17
18
19
20
21
22
23
24
25
26
27
28
29
30
31
32
33
34
35
36
37
38
public class RedisDemoTest {
private JedisPool jedisPool;
@Before
public void doBefore() {
// 链接池配置
JedisPoolConfig poolConfig = new JedisPoolConfig();
// 当没有可用链接时是否阻塞,直到超时
poolConfig.setBlockWhenExhausted(true);
// 最大空闲链接数
poolConfig.setMaxIdle(8);
// 最小空闲链接数
poolConfig.setMinIdle(4);
// 最大链接数
poolConfig.setMaxTotal(8);
// 最大等待时间
poolConfig.setMaxWaitMillis(30000);
// 获取链接时是否检查可用性
poolConfig.setTestOnBorrow(true);
// 链接归还池时是否检查可用性
poolConfig.setTestOnReturn(true);
// 链接池
jedisPool = new JedisPool(poolConfig, "10.10.10.127", 6379, 5000);
}
@Test
public void doTest() {
Jedis jedis = jedisPool.getResource();
if (jedis.exists("myname")) {
System.out.println("=====> " + jedis.get("myname"));
} else {
jedis.set("myname", "fanlychie");
}
jedis.close();
}
}

7. 与Spring集成

# pom.xml


1
2
3
4
5
6
7
8
9
10
11
12
13
14
15
16
17
18
19
20
21
22
23
24
25
26
27
28
29
30
31
32
<dependency>
<groupId>org.springframework</groupId>
<artifactId>spring-context</artifactId>
<version>4.3.18.RELEASE</version>
</dependency>
<dependency>
<groupId>org.springframework.data</groupId>
<artifactId>spring-data-redis</artifactId>
<version>1.8.12.RELEASE</version>
</dependency>
<dependency>
<groupId>redis.clients</groupId>
<artifactId>jedis</artifactId>
<version>2.9.0</version>
</dependency>
<dependency>
<groupId>com.fasterxml.jackson.core</groupId>
<artifactId>jackson-databind</artifactId>
<version>2.9.6</version>
</dependency>
<dependency>
<groupId>junit</groupId>
<artifactId>junit</artifactId>
<version>4.12</version>
<scope>test</scope>
</dependency>
<dependency>
<groupId>org.springframework</groupId>
<artifactId>spring-test</artifactId>
<version>4.3.18.RELEASE</version>
<scope>test</scope>
</dependency>

redis 参数配置

# redis.properties


1
2
3
4
5
6
7
8
9
10
11
12
13
14
15
16
17
18
19
20
# 主机
redis.hostName = 10.10.10.127
# 端口
redis.port = 6379
# 数据库
redis.database = 0
# 当没有可用链接时是否阻塞,直到超时
redis.blockWhenExhausted = true
# 最大空闲链接数
redis.maxIdle = 8
# 最小空闲链接数
redis.minIdle = 4
# 最大链接数
redis.maxTotal = 8
# 最大等待时间
redis.maxWaitMillis = 30000
# 获取链接时是否检查可用性
redis.testOnBorrow = true
# 链接归还池时是否检查可用性
redis.testOnReturn = true

spring 配置:

# spring-context.xml


1
2
3
4
5
6
7
8
9
10
11
12
13
14
15
16
17
18
19
20
21
22
23
24
25
26
27
28
29
30
31
32
33
34
35
36
37
38
39
40
41
42
43
44
45
46
47
48
49
50
51
52
53
54
55
56
57
58
59
60
<?xml version="1.0" encoding="UTF-8"?>
<beans xmlns="http://www.springframework.org/schema/beans"
xmlns:xsi="http://www.w3.org/2001/XMLSchema-instance"
xmlns:context="http://www.springframework.org/schema/context"
xsi:schemaLocation="http://www.springframework.org/schema/beans
http://www.springframework.org/schema/beans/spring-beans.xsd
http://www.springframework.org/schema/context
http://www.springframework.org/schema/context/spring-context.xsd">
<bean class="org.springframework.beans.factory.config.PropertyPlaceholderConfigurer">
<property name="locations">
<list>
<value>classpath:redis.properties</value>
</list>
</property>
</bean>
<context:annotation-config/>
<context:component-scan base-package="org.fanlychie"/>
<!-- redis 链接池配置 -->
<bean id="poolConfig" class="redis.clients.jedis.JedisPoolConfig">
<property name="blockWhenExhausted" value="${redis.blockWhenExhausted}"/>
<property name="maxIdle" value="${redis.maxIdle}"/>
<property name="minIdle" value="${redis.minIdle}"/>
<property name="maxTotal" value="${redis.maxTotal}"/>
<property name="maxWaitMillis" value="${redis.maxWaitMillis}"/>
<property name="testOnBorrow" value="${redis.testOnBorrow}"/>
<property name="testOnReturn" value="${redis.testOnReturn}"/>
</bean>
<!-- redis 链接配置 -->
<bean id="connectionFactory" class="org.springframework.data.redis.connection.jedis.JedisConnectionFactory">
<property name="poolConfig" ref="poolConfig"/>
<property name="hostName" value="${redis.hostName}"/>
<property name="port" value="${redis.port}"/>
<property name="database" value="${redis.database}"/>
</bean>
<!-- redis 字符串序列化 -->
<bean id="stringRedisSerializer" class="org.springframework.data.redis.serializer.StringRedisSerializer"/>
<!-- redis 对象转为json串序列化 -->
<bean id="jsonRedisSerializer" class="org.springframework.data.redis.serializer.GenericJackson2JsonRedisSerializer">
<constructor-arg name="mapper">
<bean class="com.fasterxml.jackson.databind.ObjectMapper"/>
</constructor-arg>
</bean>
<!-- redis 模板 -->
<bean id="redisTemplate" class="org.springframework.data.redis.core.RedisTemplate">
<property name="connectionFactory" ref="connectionFactory"/>
<property name="keySerializer" ref="stringRedisSerializer"/>
<property name="valueSerializer" ref="jsonRedisSerializer"/>
<property name="hashKeySerializer" ref="stringRedisSerializer"/>
<property name="hashValueSerializer" ref="jsonRedisSerializer"/>
</bean>
</beans>

单元测试:

1
2
3
4
5
6
7
8
9
10
11
12
13
14
15
16
17
18
19
20
@RunWith(SpringJUnit4ClassRunner.class)
@ContextConfiguration("/spring-context.xml")
public class RedisSpringDemoTest {
@Autowired
private RedisTemplate redisTemplate;
@Test
public void doTest() {
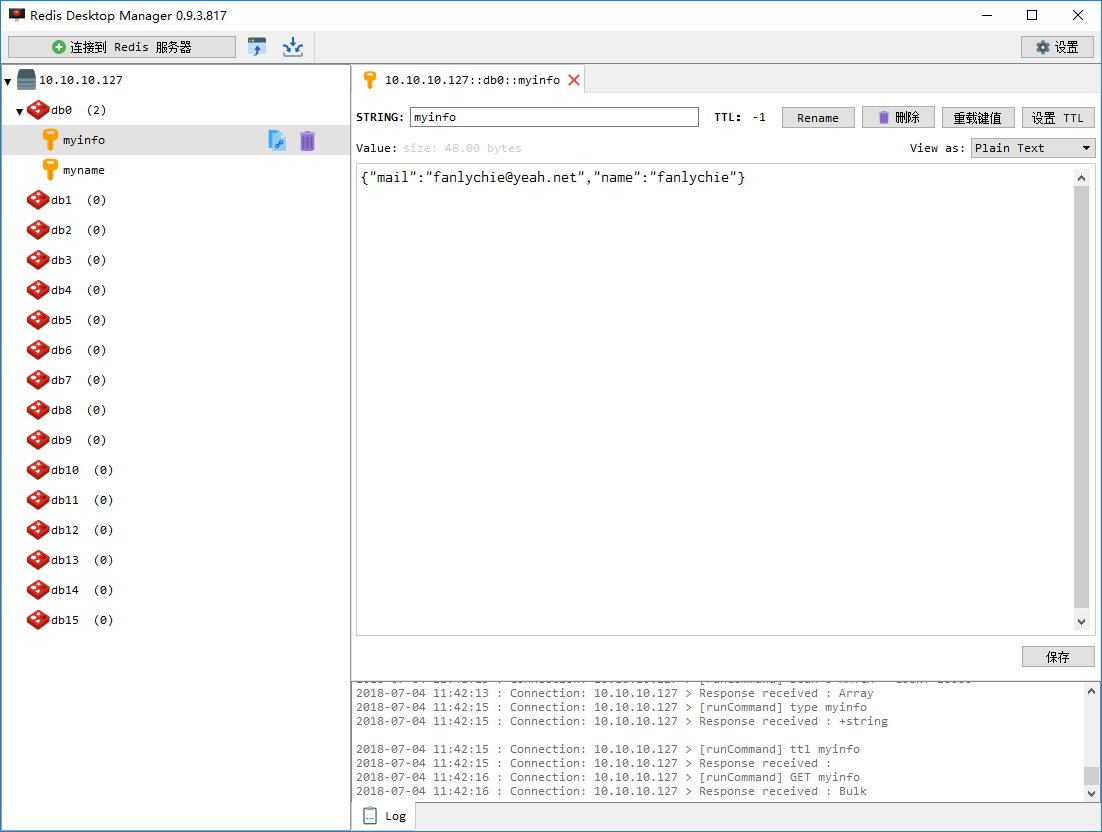
if (redisTemplate.hasKey("myinfo")) {
System.out.println("=====> " + redisTemplate.opsForValue().get("myinfo"));
} else {
Map<String, Object> map = new HashMap<>();
map.put("name", "fanlychie");
map.put("mail", "fanlychie@yeah.net");
redisTemplate.opsForValue().set("myinfo", map);
}
}
}